Convert a Non-DTMF TK-481 to DTMF
If you own a Version 2 Kenwood TK-481 4-Key Keypad model and you want to add the DTMF function to it here’s a quick easy way to do it for under $90. You will need to purchase the required parts from a Kenwood replacement parts dealer such as Pacific Coast Parts or East Coast Transistor.
PARTS REQUIRED:
Part # |
Description |
QTY |
X54-3210-11A |
Display Section |
1 |
G53-0841-22 |
Keypad (16-Key) |
1 |
A02-3659-23 |
16-Key Front Case Assembly |
1 |
G10-0799-04 |
Fibrous Sheet |
1 |
Part # |
Description Optional Items |
QTY |
T91-0579-05 |
Mic Element |
1 |
S70-0414-05 |
Tact Switch |
1 |
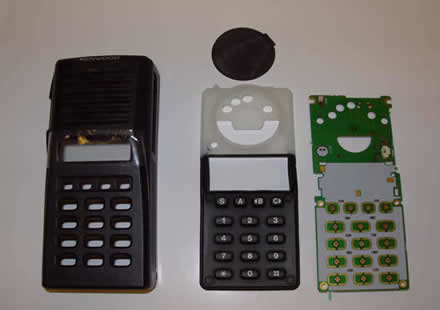
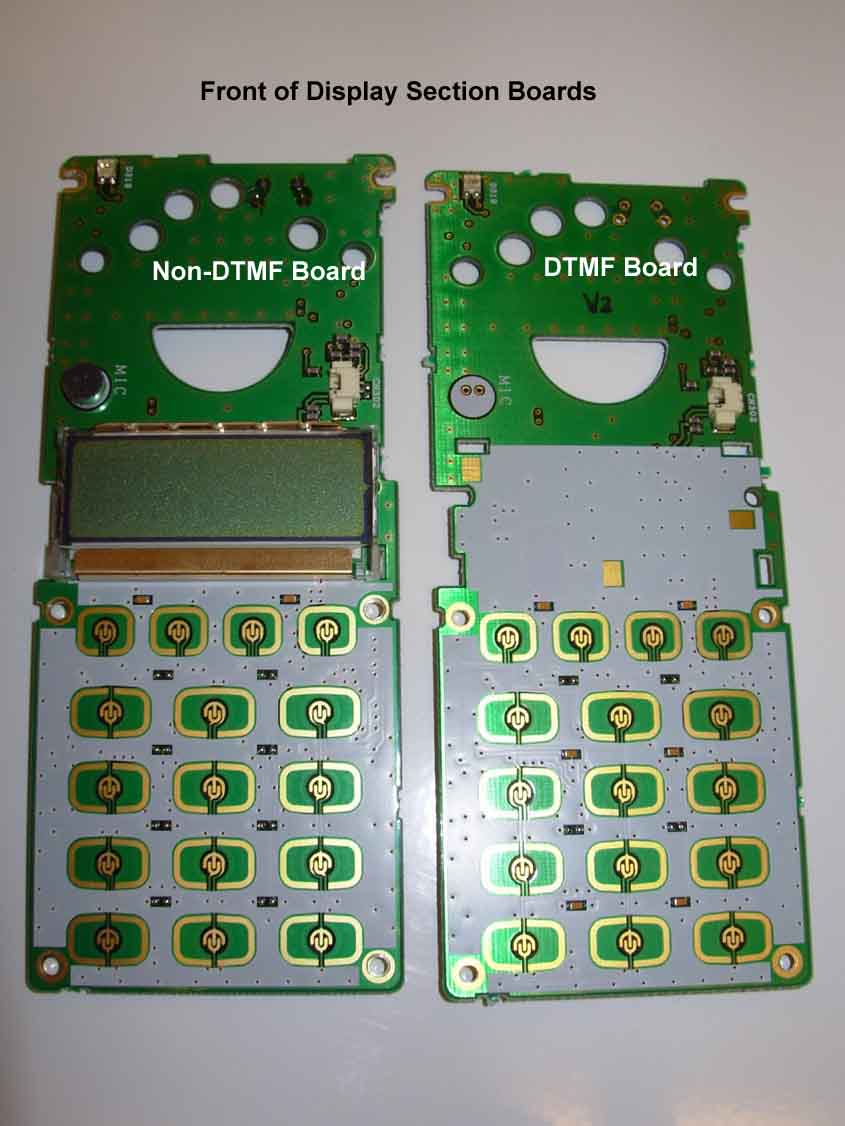
To convert a 4 key non-DTMF Version 2 TK-481 to DTMF you must remove and re-use the existing LCD display as well as re-use the PTT keypad with attached keys. The new Display Section listed above does not come with the Mic Element or the Tactical Switch (Orange Button) attached; therefore you must either remove the old one from your radio or buy them new and solder them in place. Please also note that the 16-Key Front Case Assembly does not come with the speaker grill Fibrous Sheet- it is sold separately.
Steps Involved:
- Remove Battery from radio as well as the antenna, belt clip, and Speaker Mic/Programming port terminal cover plate
- Remove the two screws from the bottom of the radio and remove radio from front case assembly
- Remove 4-Key Keypad and unplug speaker, install speaker in 16-Key Keypad
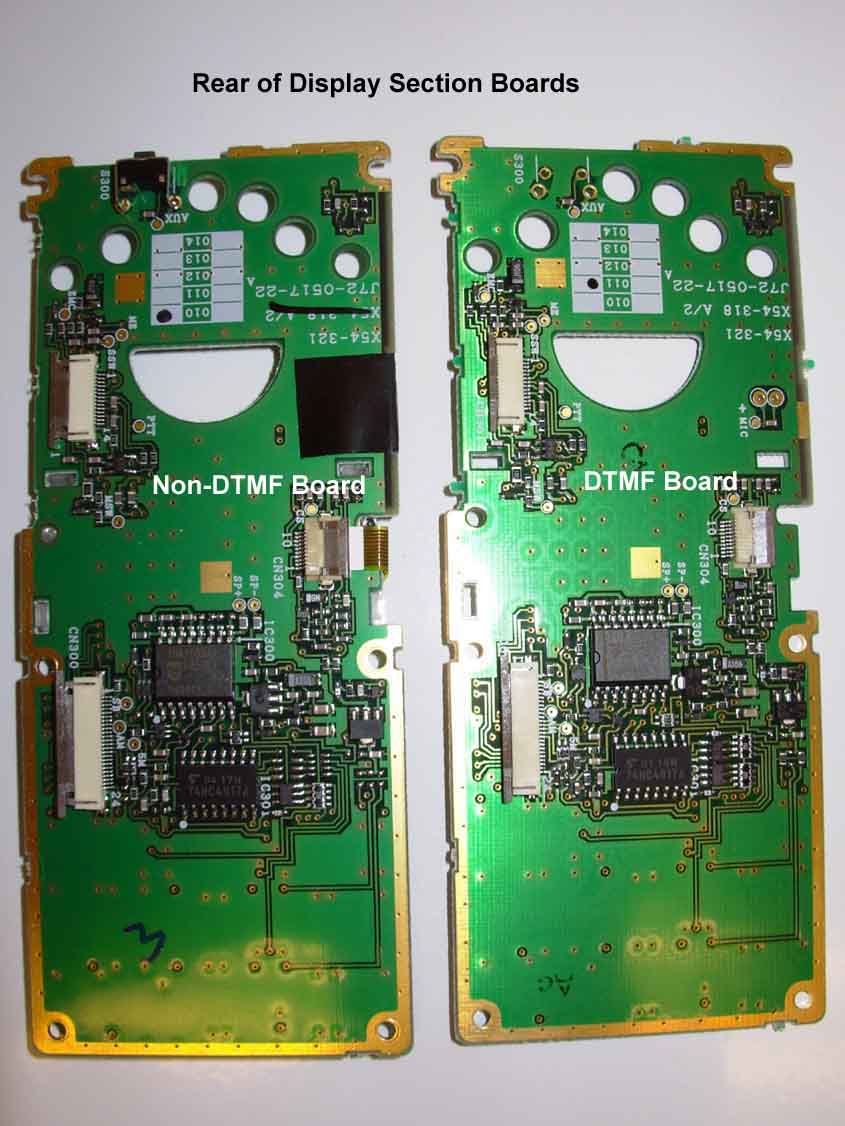
- Remove the 6 screws holding the existing non-DTMF Display Board in place and unplug the 2 ribbon cables (carefully!)
- Remove and unplug the ribbon cable on the LCD assembly and install it on the new DTMF Display Board assembly
- Either remove the Mic Element and Tactical Switch from the non-DTMF Display Board and install on the new DTMF Display Board OR if you purchased a new Mic Element and Tactical Switch install them on the DTMF Display Board by soldering them in place, be sure to place a small piece of electrical tape over the Mic element terminals to prevent them shorting out on the RF shield underneath
- Plug the 2 ribbon cables back into the new DTMF Display Board Assembly and reattach the 6 screws holding it to the main RF unit/radio
- Plug in the Speaker and install the 16-Key Keypad
- Attach the Fibrous Sheet over the speaker grill opening on the 16-Key Front Case Assembly
- Reinstall the radio carefully in the 16-Key Front Case Assembly, reattach the antenna, belt clip, and Mic/Programming port terminal cover plate
- In KPG-49D you must enable the keypad in order for it to work. Simply go to “Program” then “Read Data From Radio” then go to “Model” then “Model Information” and then select “TK-481 [Portable] (Key Pad Model)”.
- Write back to the radio and now you have full DTMF Functionality!