Kenwood TK-931 Filter Re-Tune
The Kenwood TK-931 (any model) has two receive filters that are centered at 938MHz and do not pass signals very well at 927.xxxxMHz. These filters can either be re-tuned or changed out so that the receiver in your TK-931 will come alive!
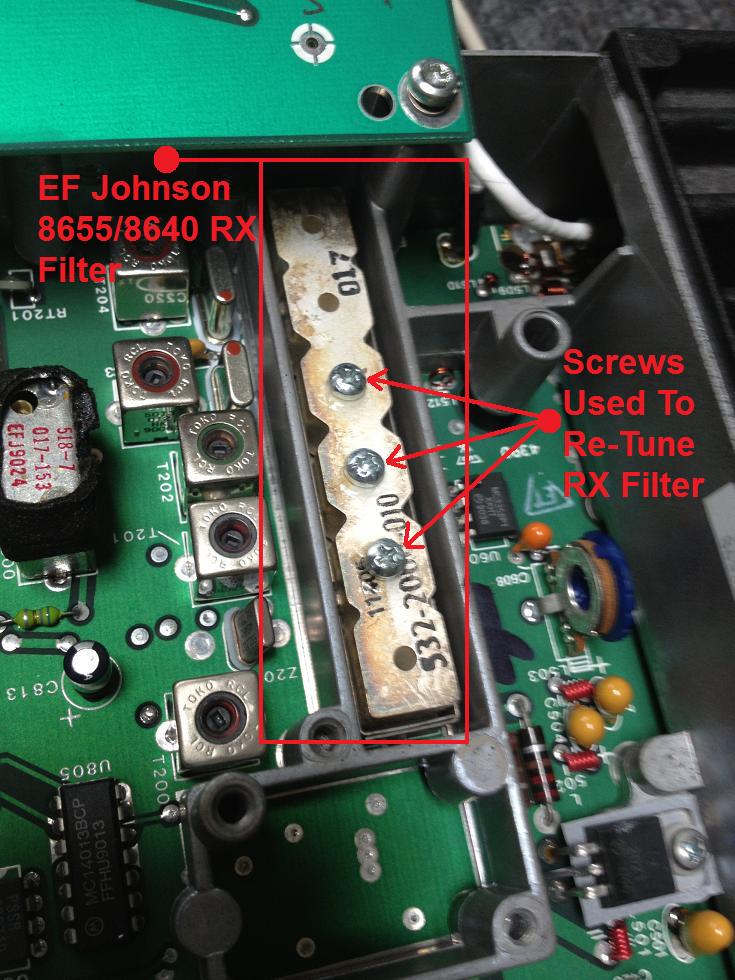
Filter re-tuning is not something new; it was first concocted in ~2004 with the EF Johnson 8655 and 8640 900MHz radios. The EF Johnson 8600 series has a rather large front end receive filter that can be re-tuned to 927.xxxxMHz very easily using 4-40 screws as pictured below.
The TK-931 has a 3 pole Murata DFC3R938P006BTD RX filter and a 4 pole DFC4R938P006BTD RX filter. Both filters are only 6 MHz wide, meaning they pass signals from 941 to 935MHz with little attenuation. At 927.xxxxMHz this pair of filters really attenuates the signals passing through them. There is a cheap and easy way to make these filters work well at 927.xxxxMHz and it will only take around 15 minutes of your time!
You will need the following items:
- Quantity of two 3-48 x 1/2" steel or stainless steel screws
- Quantity of two 3-48 steel or stainless steel nuts
- 5 minute epoxy or superglue
- Phillips head screwdriver
- X-ACTO Knife
You will need the following test equipment:
- Signal Generator or service monitor capable of generating a signal at 927.0125MHz, SINAD measurement capability even better
BEFORE WE START:
Make sure that you understand that this modification is NOT for the beginner or someone inexperienced with using test equiptment. Know YOUR limitations and don't try to do this modification if it is beyond your current skill level. YOU HAVE BEEN WARNED!
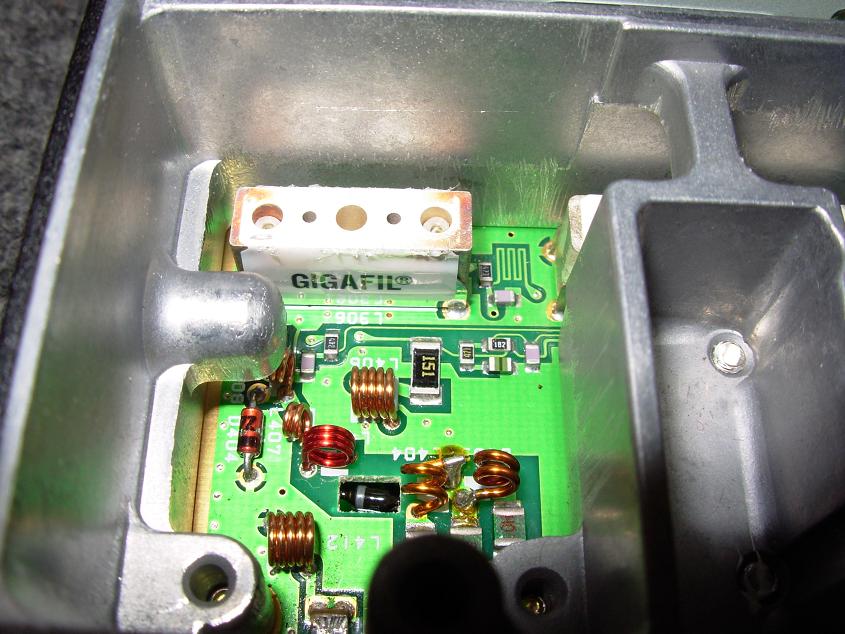
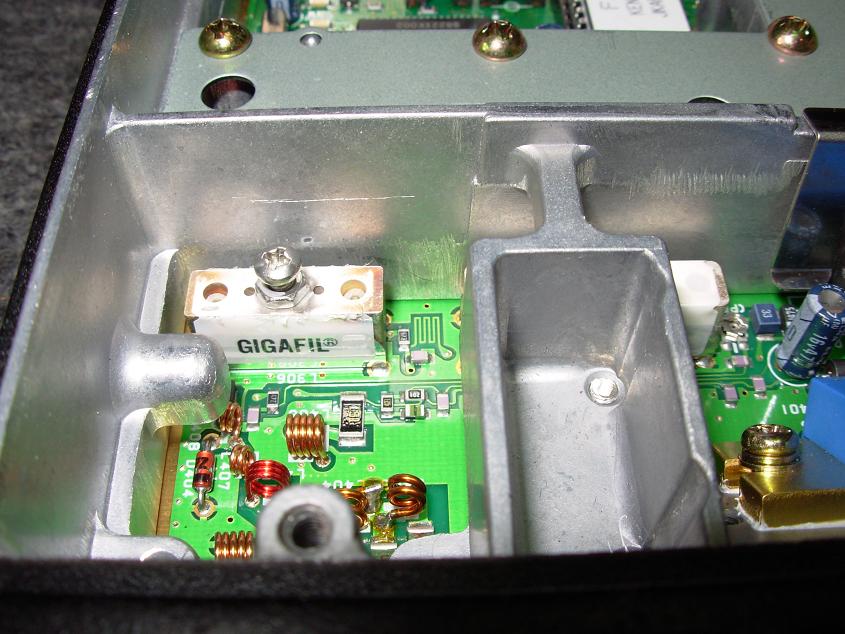
- Ensure that your radio is working properly and functioning correctly, there is no point in modifying a radio that is damaged. Before tearing into the radio power on your signal source (signal generator or service monitor) and let it warm up and stabilize. Remove the top cover of your radio and orient the radio so that the rear is facing you. Locate the 3 and 4 pole filters.

- Using your X-Acto knife score the label on top of the 3 pole filter (Carefully!) and remove the top sticker exposing the ceramic filter beneath. The center of the filter has a hole in it, we are going to be using a 3-48 x 1/2" long steel or stainless steel screw and nut to act as a plunger (like you might find on a tuning stub on a duplexer or bandpass cavity).
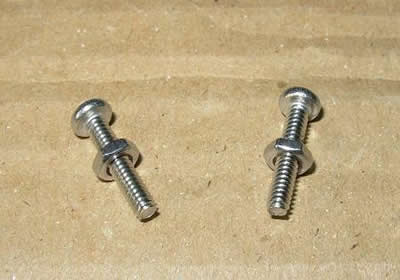
- Get both 3-48 x 1/2" steel or stainless steel screws prepared by threading the nuts on them half way as pictured below.
- Connect up your signal source/service monitor and power on the radio- set the radio to our programmed frequency of 927.0125MHz. Set the signal generator/service monitor to generate and apply a signal to the radio so that the signal is very weak and noisy into the receiver. With the radio on and the signal generator applying a noisy signal apply a little epoxy/super glue around the circumference of the center hole of the 3 pole filter. Carefully place the 3-48 x 1/2" steel or stainless steel screw in the center hole of the filter. Wait a minute or so that the glue is tacky and the nut is lightly held in place. Listening to the radio and the noisy signal; slowly and carefully thread the screw inwards towards the bottom of the filter (tighten the screw, making sure that the nut does not rotate). You will notice that as the bottom of the screw nears the bottom of the 3 pole filter the radio receiver will become clearer and less noisy. Adjust this screw for the least receiver noise (clearest signal). If you want to use the SINAD method this is the easiest/fastest method-adjust the screw for maximum SINAD.
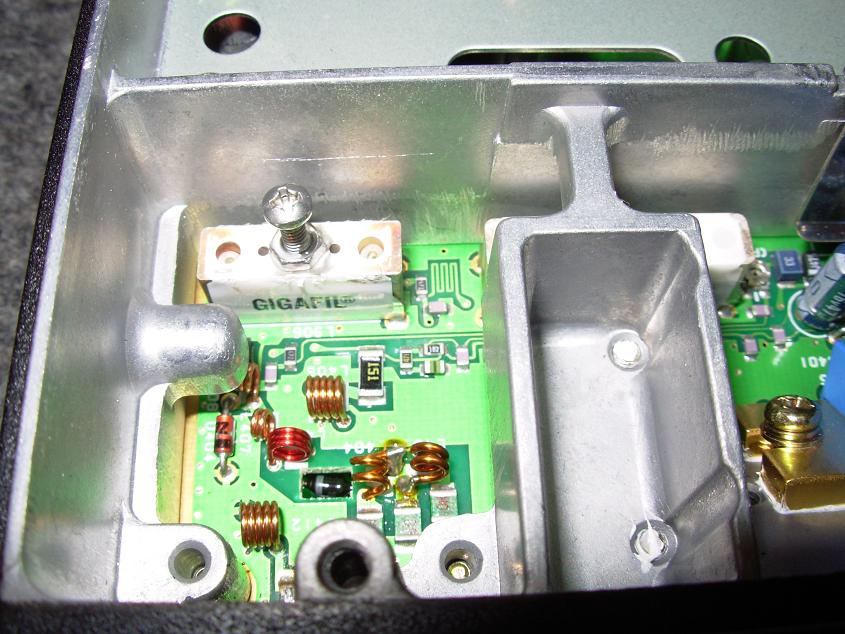
- You will notice that the screw has about 1/8 to 1/16" of thread showing after tuning- every radio will be different though.
- Using your X-Acto knife score the label on top of the 4 pole filter (Carefully!) and remove the top sticker exposing the ceramic filter beneath.
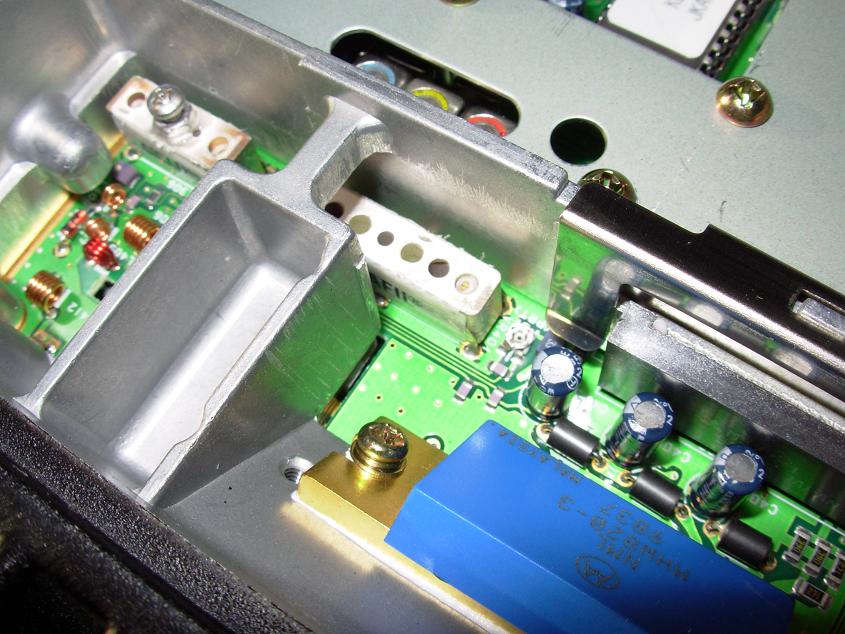
- With your signal source/service monitor on and power on the radio- set the radio to our programmed frequency of 927.0125MHz. Set the signal generator/service monitor to generate and apply a signal to the radio so that the signal is very weak and noisy into the receiver- you will need to adjust the generate level even lower than in our previous step because the radio is starting to hear better from us already re-tuning the 3 pole filter! You will notice that unlike the 3 pole filter this 4 pole filter has 2 holes. With the screw and nut that we have you will only have clear access to one of the two holes. We are going to place a tuning screw in the hole nearest the center of the radio. With the radio on and the signal generator applying a noisy signal apply a little epoxy/super glue around the circumference of the innermost hole of the 4 pole filter (the hole that is closest to the centerline of the radio). Carefully place the 3-48 x 1/2" steel or stainless steel screw in the center hole of the filter. Wait a minute or so that the glue is tacky and the nut is lightly held in place. Listening to the radio and the noisy signal; slowly and carefully thread the screw inwards towards the bottom of the filter (tighten the screw, making sure that the nut does not rotate). You will notice that as the bottom of the screw nears the bottom of the 4 pole filter the radio receiver will become much clearer and less noisy. Adjust this screw for the least receiver noise (clearest signal). If you want to use the SINAD method this is the easiest/fastest method-adjust the screw for maximum SINAD.

- Once the epoxy/superglue has dried completely you can place the top cover back on the radio. After re-tuning you will now have a radio that hears much better than it did before and it only cost around $0.60! What did the filter re-tune gain you? Well, shown below is the before/after and with filters changed results. To conclude; is it worth re-tuning or changing out the receive filters in the TK-931- yes it is!
12dB SINAD Measurement at 927.0125MHz |
|
|---|---|
Original Receive 938MHz Filters |
1.70uV (-102dBm) |
Original RX 938MHz Filters Re-Tuned for 927MHz |
0.40uV (-115dBm) |
Murata/TOKO 915MHz Filters Installed (26MHz BW) |
0.22uV (-120dBm) |